
 Facebook
 X
X
 Pinterest
 Copy Link
Wet basement? Yep, me too. But not anymore! In my previous post about French drains, I mentioned that I’ve been struggling with water entering my finished basement for the past five years I’ve owned my home. Luckily the worst part was floored with linoleum-type material, not carpet that would saturate – but I still had no idea if the water was damaging or causing mold inside the walls. Exterior French drains were installed, but the water always found a way back into the office.
After reaching the conclusion that we live on top of a “seasonal spring” and realizing no further exterior work was feasible, tearing up the basement to waterproof the “cold joint” (the place where the concrete foundation walls meet the slab) sounded like the best option. This solution involves putting an interior French drain around the perimeter of the basement and covering it with a waterproof membrane before closing up the walls and floors. Water then seeps into the pipe and drains out by gravity if you have the slope for it, or by sump pump if you don’t. Rather than continually fight the water intrusion, this feels like a much more Zen-like approach: allow the water to enter where it wants to, capture it, and then redirect it where YOU want it to go to avoid damaging your home.
Diving in? Surprisingly, this can be a pretty fast process – my project took one week for the demolition and the drain install. The repairs to walls and floors took longer because we chose to DIY.
Here are some progress photos of the office portion of the project; the guest room, bathroom, laundry room, and garage were part of the full endeavor.
Demolition: drywall, insulation, and framing are removed to a height of 2’ throughout the entire area. Flooring also needs to be removed, and in my case, completely replaced.
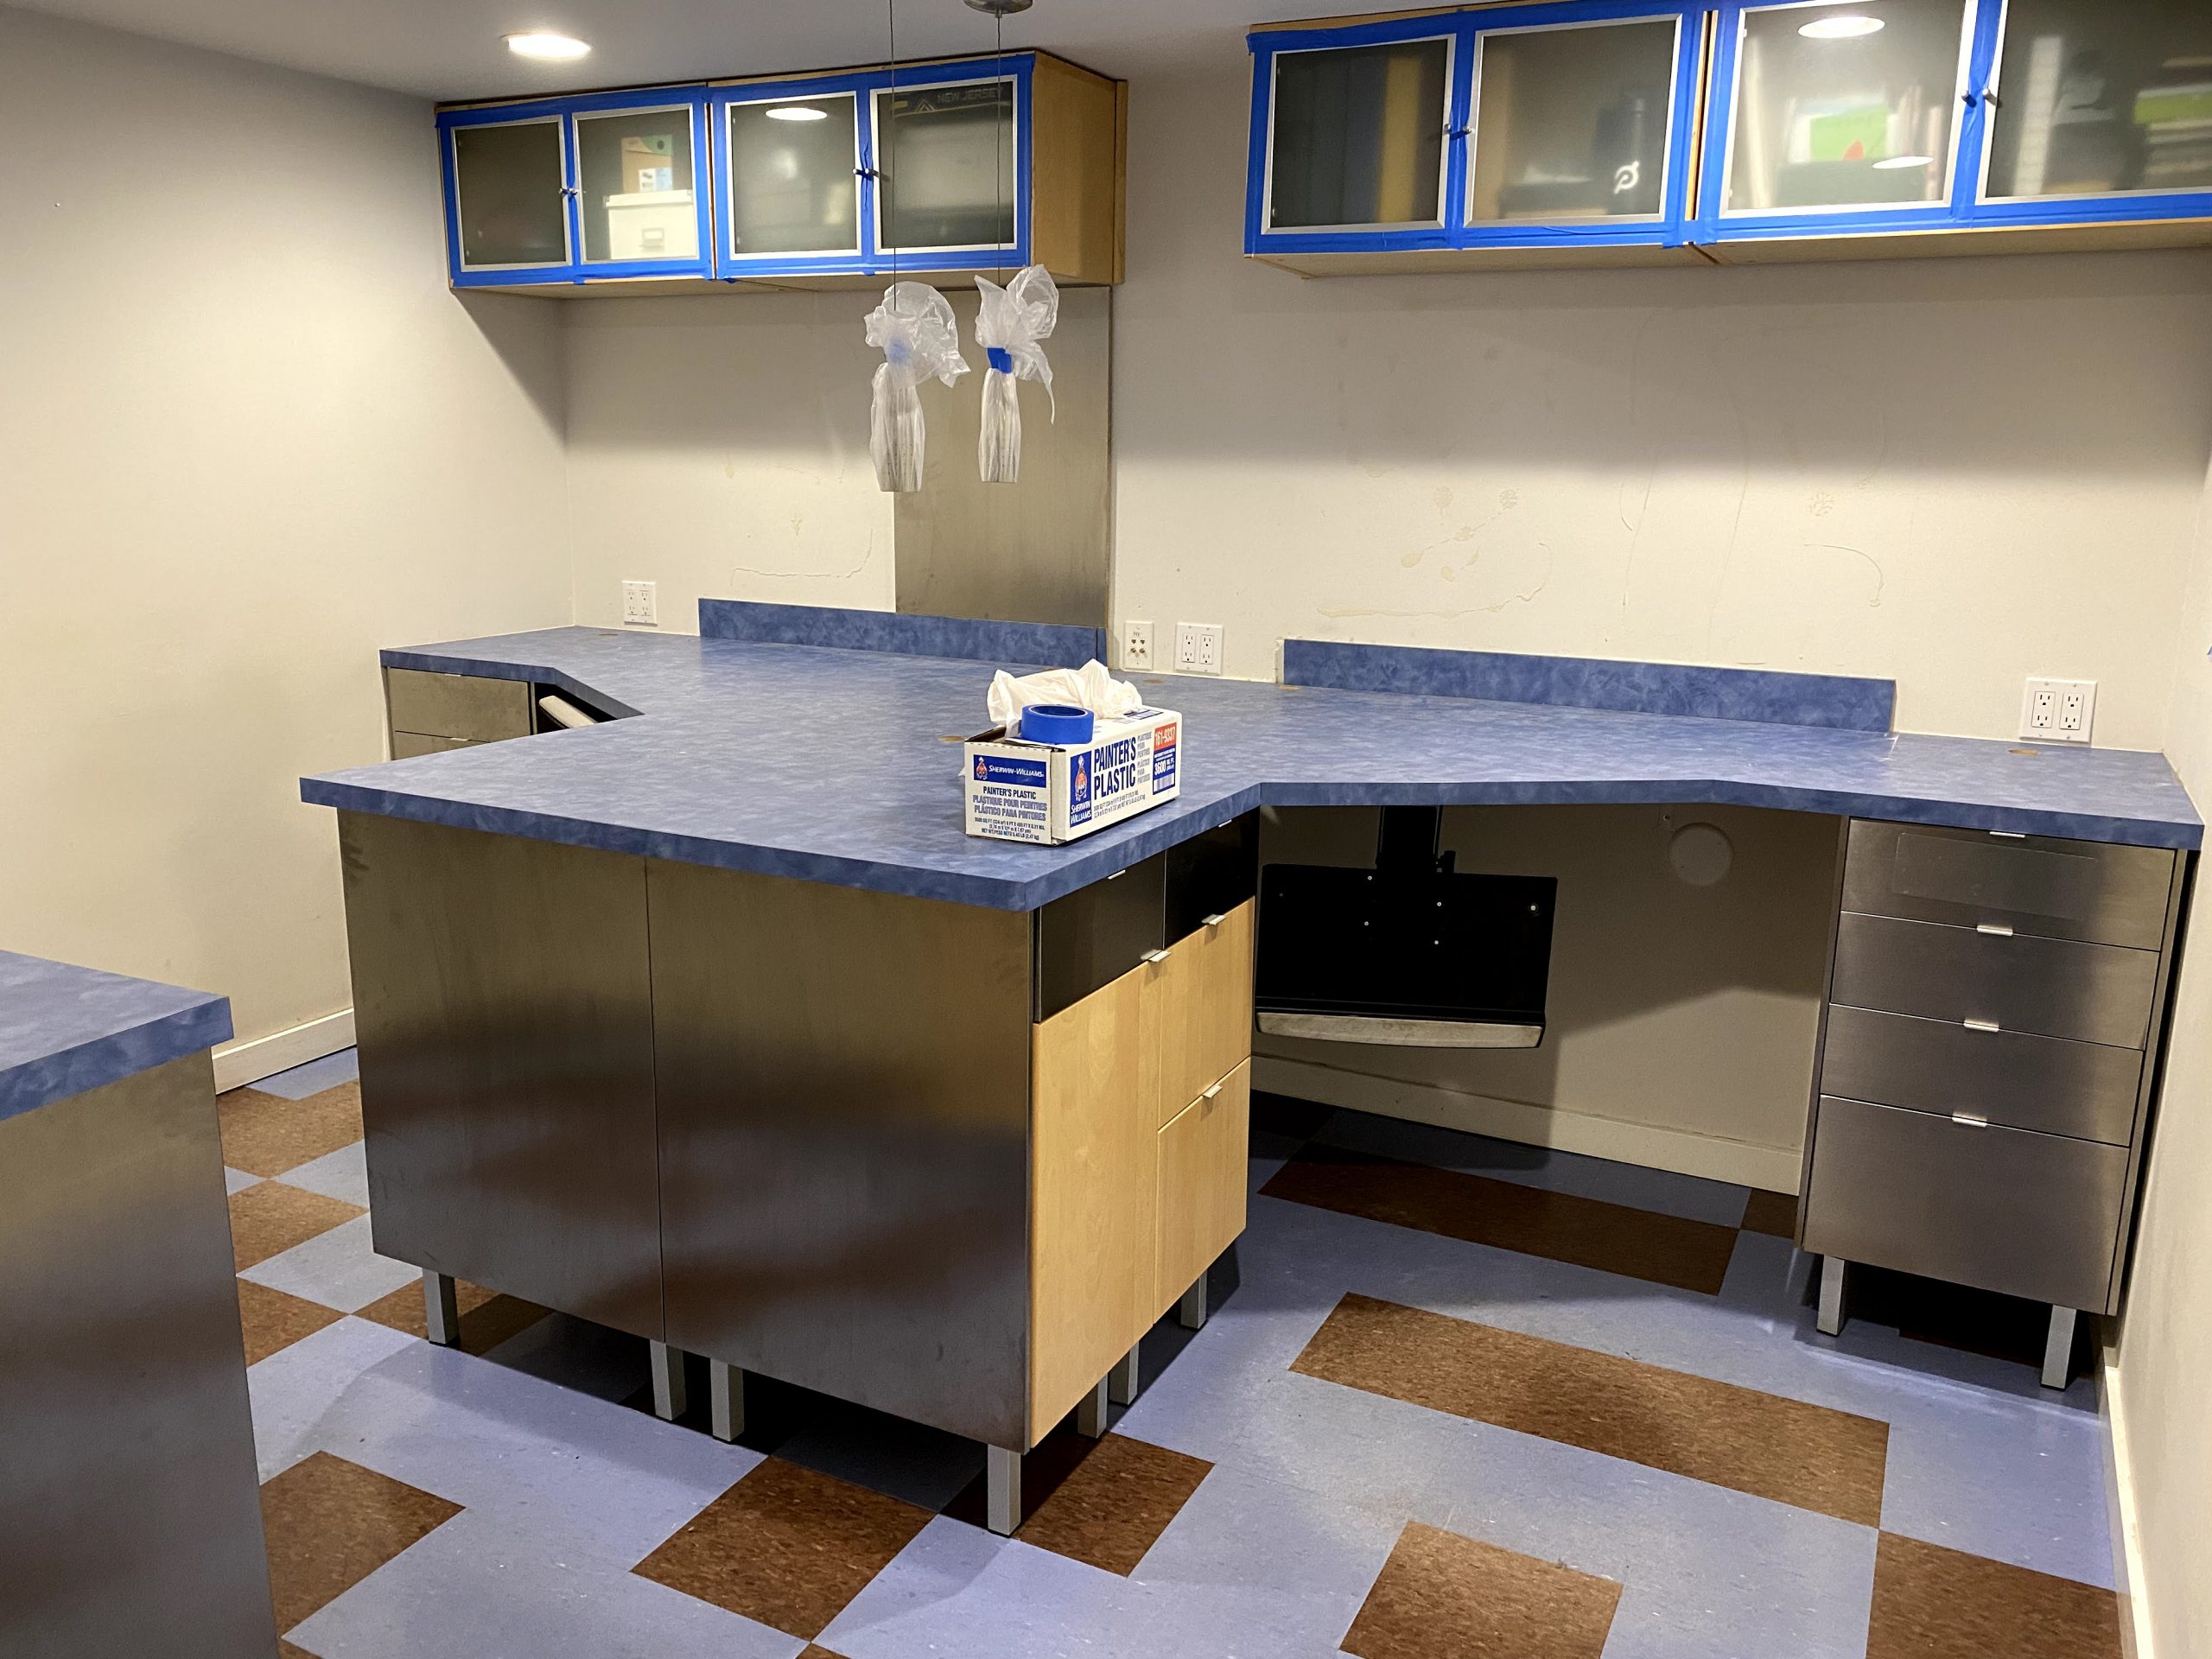
Office: before construction
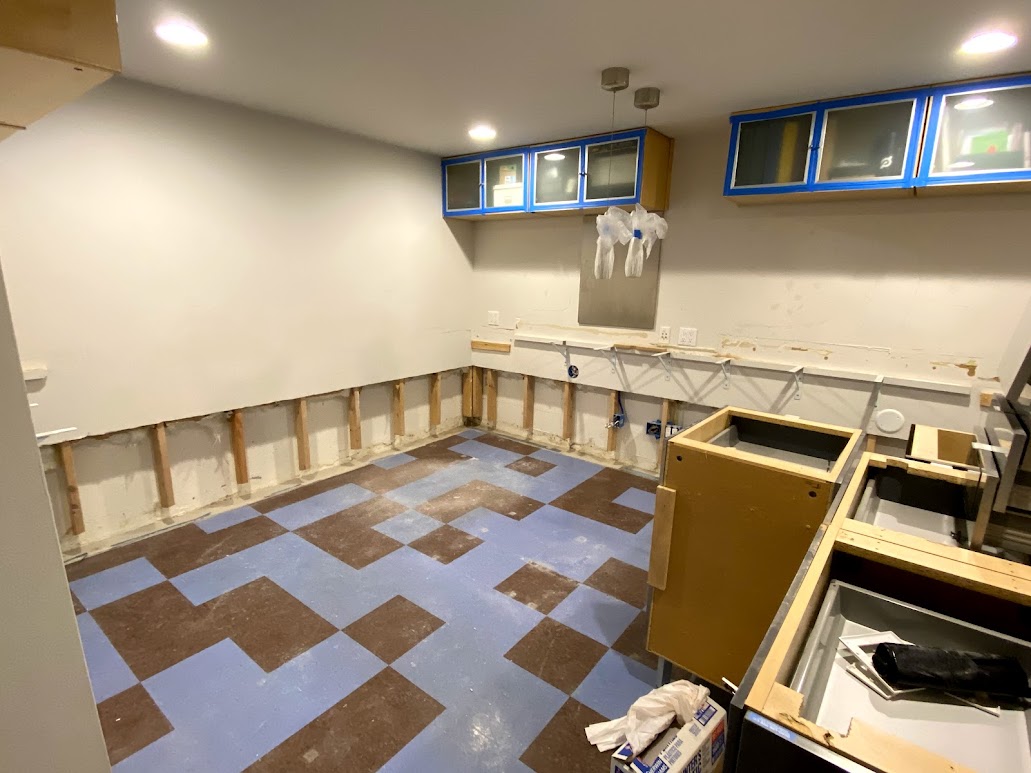
Walls demolished and prepped
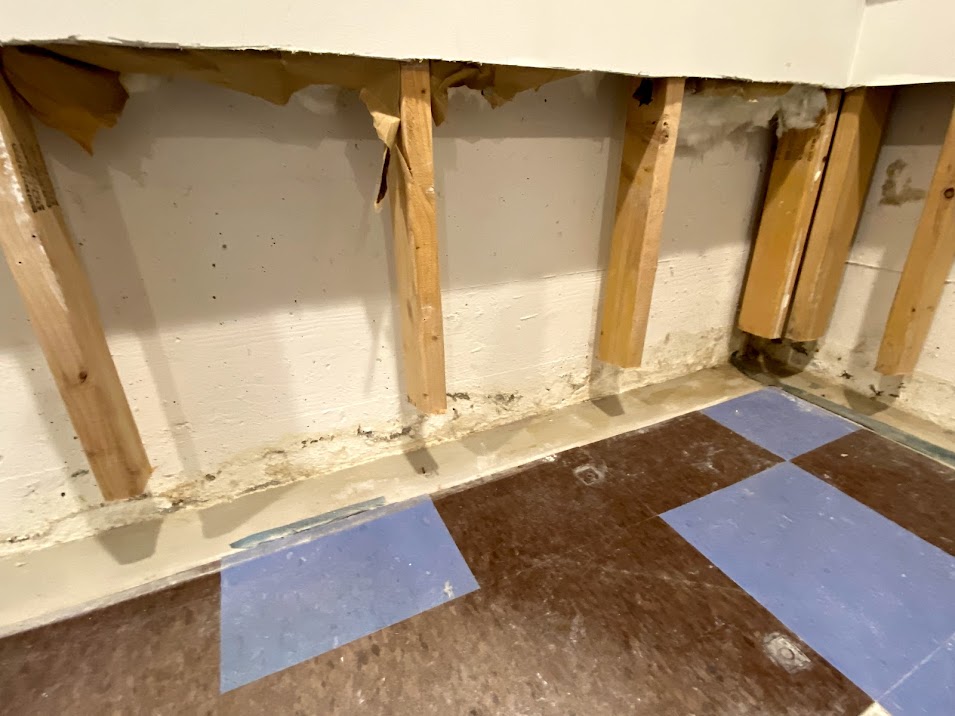
Markings from water intrusion at the cold joint
Trenching: the drainage team jackhammered a trench into the foundation. In the process, they discovered this home ALREADY had a basement drainage system, but it was completely clogged and clearly not waterproofed! They ripped it out, cleaned up the mud, and replaced it with new piping and gravel.
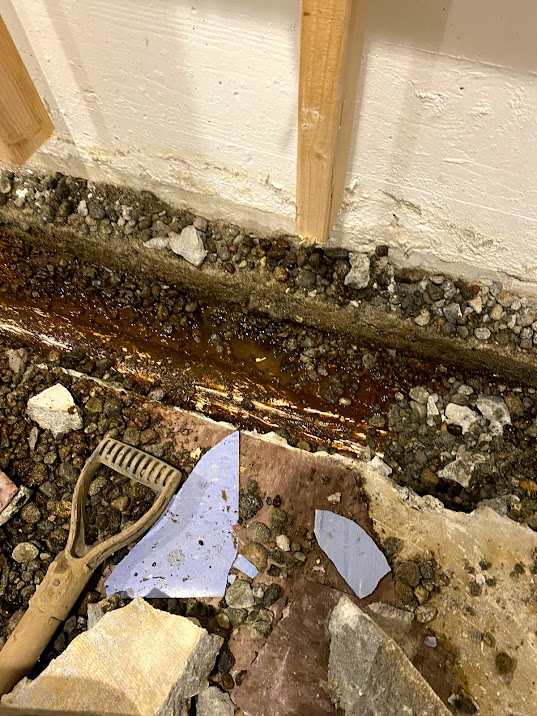
Trench exposed an old, clogged drain which was removed.
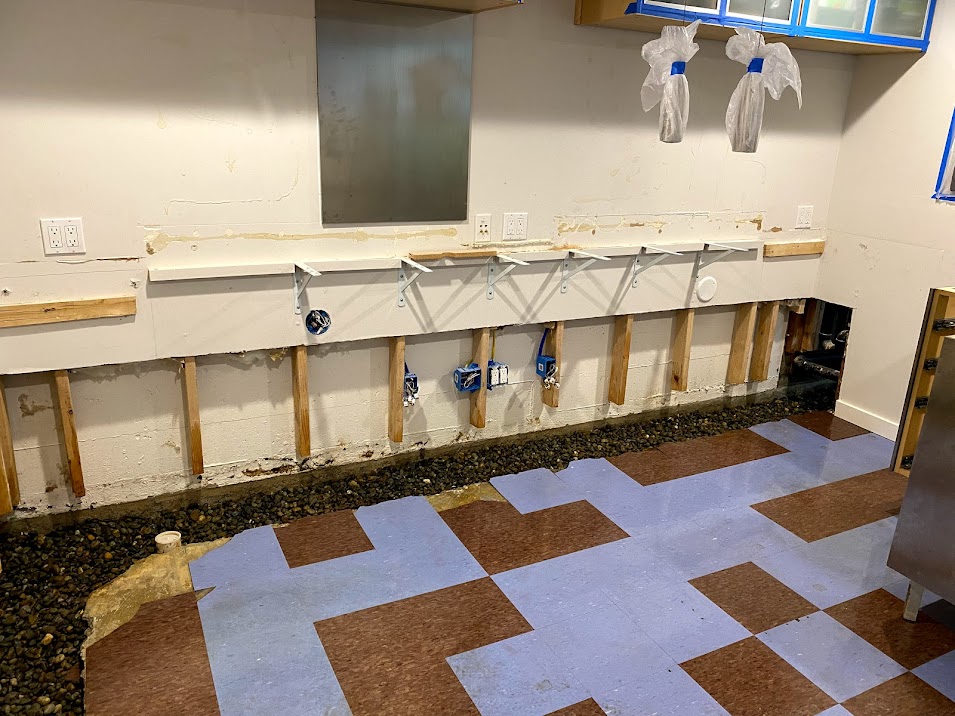
New drains installed, new gravel
Waterproofing: the black waterproof membrane was installed behind the studs and over the drainage trench, and then it was covered with a layer of concrete to provide a level base for flooring to be installed over it. Note: use only adhesive products when reinstalling framing and flooring over the drains. Any screws/nails/bolts will puncture the waterproof membrane.
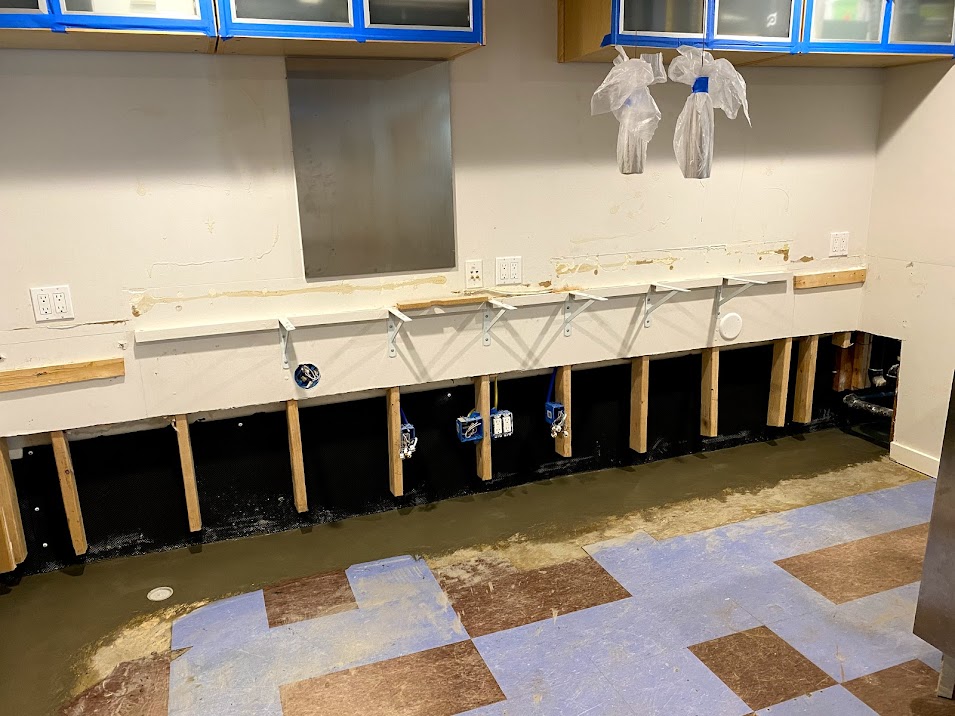
Finished drain with waterproof membrane and concrete covering
Maintenance: this system has four “clean-out” ports for access. Once or twice a year, I’ll run water into the system at the beginning, and watch to make sure it flows past each of the ports and out of the system. I can also check during the rainy season and see that the system is collecting water, which sort of puts my mind at ease.
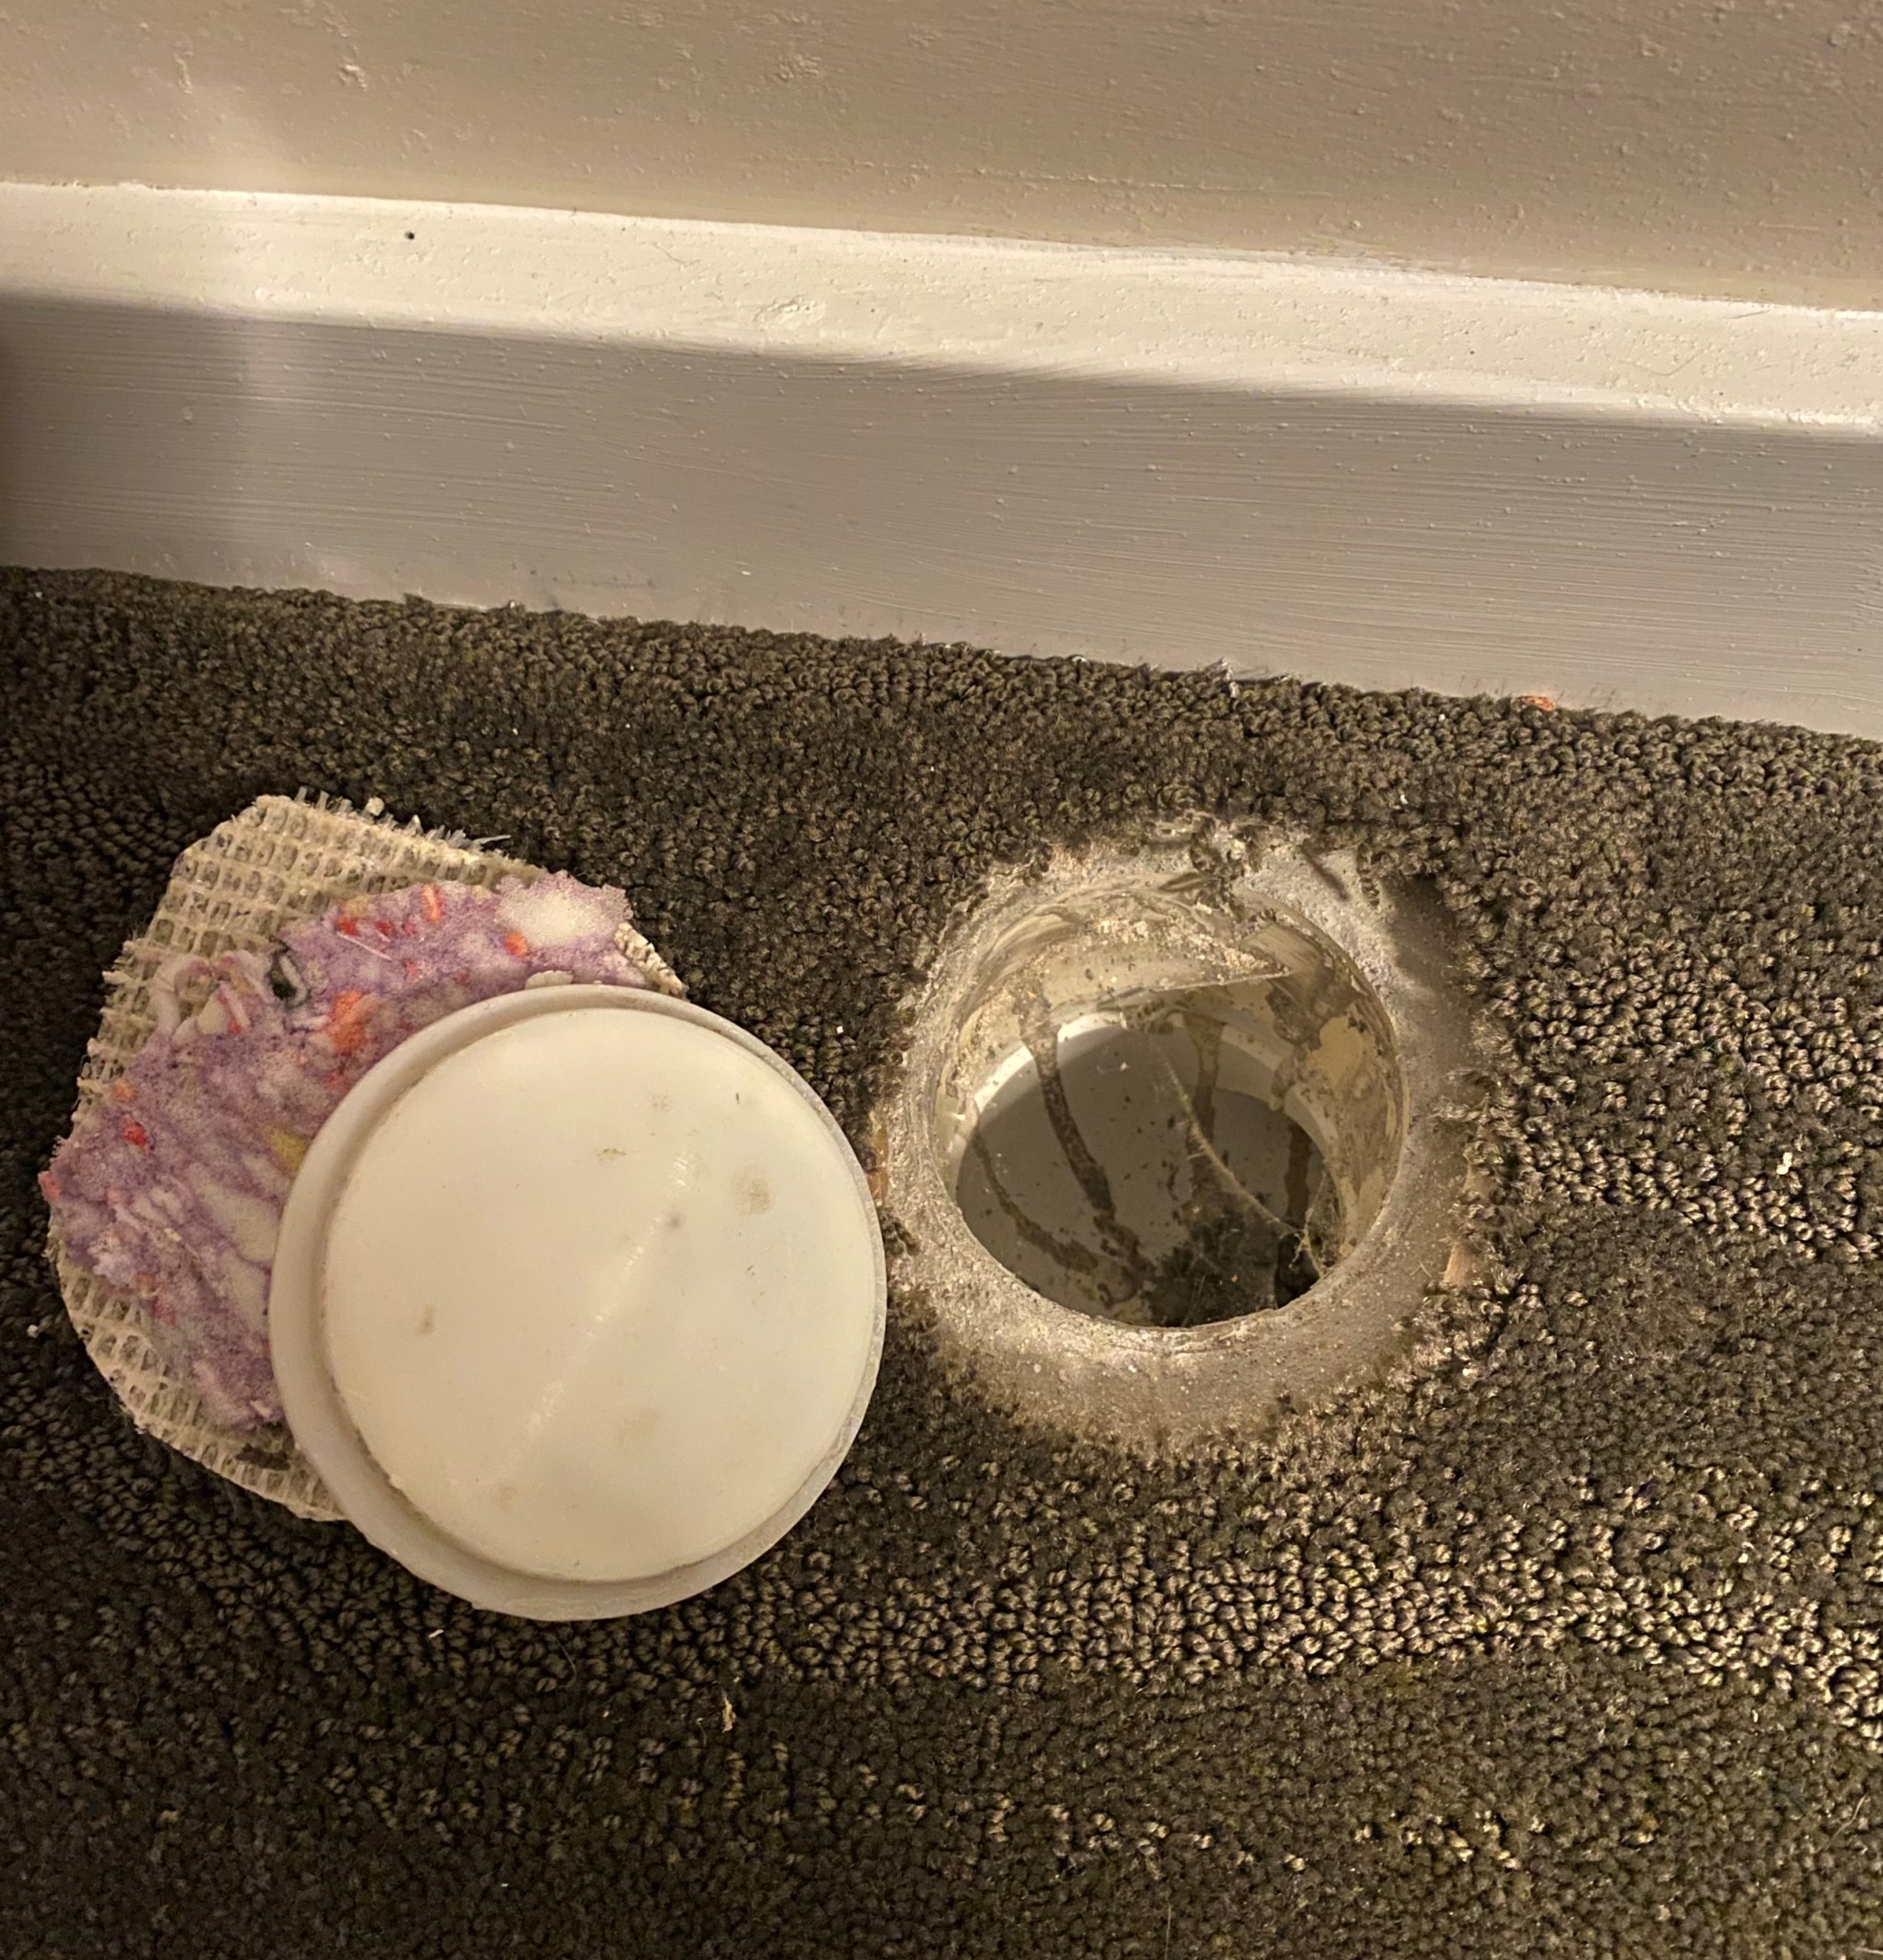
One of four access points to the new drainage system
Future: Friends who’ve had their system for a few years have said their new-found peace-of-mind during winter storms is incredible. I’ll admit it’s hard to shake that anxiety about water intrusion, but I already feel 100 times more comfortable in this first season testing it out! Next up: putting the walls back together…
